A robotic arm swings over a target, lowers its gripper, and closes its jaws. Instead of picking up the object, the gripper crushes it. The hardware works perfectly. The mechanical design is flawless. The software is the problem.
When you program physical movement, you control reality. A logic error does not just print a red line on a screen. It breaks physical components. Writing effective claw code requires exact timing, precise motor control, and continuous sensor feedback. You have to translate digital commands into smooth, mechanical force.
Most developers start with simple open-and-close commands. This works for basic projects. But industrial automation and advanced robotics demand more. You need code that adapts to different shapes, weights, and fragile materials.
Here is how to write, test, and optimize code for robotic grippers, whether you build a desktop project or program an industrial assembly line.
Understanding the Mechanics Behind Claw Code
Before you type a single line of code, you need to understand how the hardware interprets your instructions. Software and hardware must work together perfectly.
How Servos Read Your Commands
Most robotic claws use servo motors. Unlike standard DC motors that spin continuously, a servo motor moves to a specific angle and holds that position. You control this movement using Pulse Width Modulation (PWM).
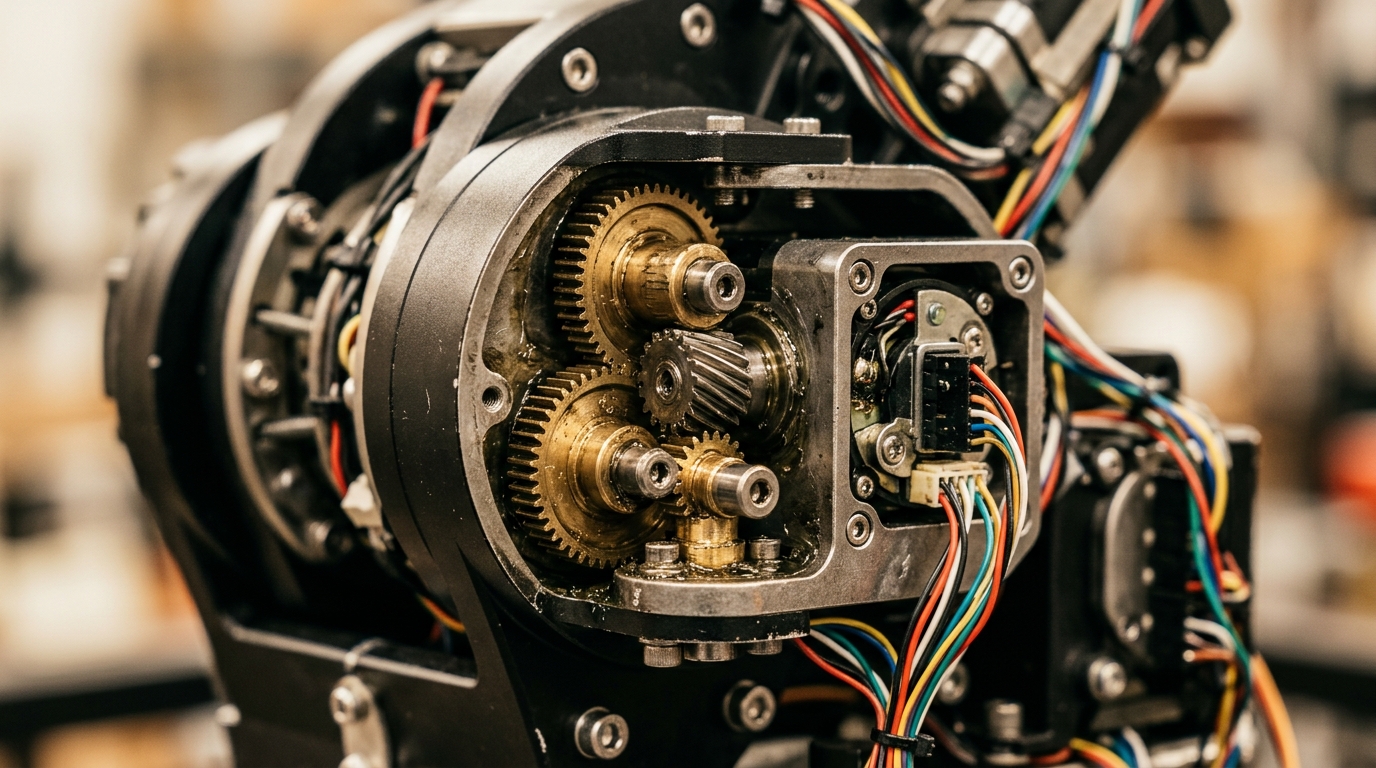
PWM sends electrical pulses to the motor. The length of the pulse tells the motor exactly where to move. A short pulse might move the claw to a wide-open position. A longer pulse tells it to close completely. Your code simply defines the length and frequency of these pulses.
The Importance of Polling Rates
Your code needs to check the status of the claw constantly. This is the polling rate. If your code checks the sensors too slowly, the claw might crush an object before the software realizes it made contact.
High-performance robotics run control loops at 1000 times per second (1 kHz). For a standard desktop Arduino project, 50 times per second is usually enough. You must balance the polling rate with your processor’s limits. Overloading a basic microcontroller with complex math will slow down the control loop and cause erratic movements.
Mapping Physical Limits in Software
Every mechanical claw has physical limits. It can only open so wide. It can only close so tight.
If your code tells a servo to move past its physical limit, the motor will stall. A stalled motor draws massive amounts of electrical current. This drains batteries rapidly. Worse, it overheats the motor and can burn out your control board. You must hard-code these physical limits into your variables before you run any movement functions.
Top Software Tools for Robotics Programming
You do not have to write everything from scratch. The right development environment makes hardware integration much easier. Grouping your tools by category helps you build a clean workflow.
Traditional Hardware IDEs
The Arduino IDE remains the standard starting point for hardware programming. It handles the messy background tasks of compiling C++ code into machine instructions. It also manages the specific libraries needed for thousands of different sensor types.
For more complex projects, developers often move to PlatformIO. This tool runs inside Visual Studio Code. It offers better autocomplete features, easier library management, and direct integration with version control systems like Git.
AI Productivity Assistants
Artificial intelligence changes how we write hardware logic. Tools like GitHub Copilot and Claude can generate boilerplate code for servo control in seconds.
You can describe your hardware setup to an AI tool. Tell it you have a 180-degree servo on pin 9 and a pressure sensor on analog pin 1. The AI will output the basic setup and loop functions. This fits perfectly into the growing trend of ai productivity tools speeding up development cycles. You still need to test and refine the logic, but AI eliminates the tedious setup work.
Simulation Software
Testing physical hardware takes time. Testing code on a virtual robot takes seconds.
Programs like Webots or Tinkercad allow you to build a virtual circuit and mechanical claw. You can upload your code to the virtual model and watch how it behaves. If your logic is wrong, the virtual claw breaks. You fix the code, reset the simulation, and try again. This prevents expensive hardware damage during the early stages of development.
Structuring Your First Claw Code Script
Writing the logic requires a specific sequence. Hardware needs to be initialized before it receives commands. Here is how to structure a reliable script.
Step 1: Initialization and Setup
Your program starts by including the necessary libraries. In C++ or Arduino, you include the basic Servo library. Next, you define your variables.
You need to name your motor. You also need to define the exact data pins where your hardware connects to the board. Finally, you set the default state. When the robot turns on, the claw should always move to a safe, open position.
Step 2: Defining the Open and Close Functions
Do not put all your movement logic inside the main program loop. Write separate functions for opening and closing. This makes your code modular and easier to read.
Your The openClaw() function should tell the servo to move to the maximum safe angle. Your closeClaw() function should move it to the minimum angle.
Instead of jumping instantly from open to closed, use a loop to move the servo one degree at a time. Add a tiny delay of 10 to 15 milliseconds between each degree. This creates a smooth, controlled motion instead of a violent snap.
Step 3: Implementing Variable Grip Control
Basic code just opens and closes. Advanced code stops closing when it hits an object.
To do this, you pass a variable into your close function. Instead of telling the claw to close completely, you tell it to close until a specific condition is met. This condition might be a specific angle, or it might be a sensor reading. We will look at sensor integration next.
Advanced Logic: Integrating Sensor Data
A blind claw is a dangerous claw. To grab delicate objects, your software needs to feel what it touches. You achieve this by reading sensor data during the movement loop.
Using Force-Sensing Resistors
A Force-Sensing Resistor (FSR) changes its electrical resistance when you press on it. You mount these sensors on the inside of the gripper jaws.
As your code slowly closes the claw, it reads the FSR value. You set a threshold variable in your code. When the FSR reading passes that threshold, the closeClaw() function stops immediately. The software now knows it has a firm grip on the object. If the object is soft like a piece of fruit, you set a low threshold. If the object is a heavy metal block, you set a high threshold.
Monitoring Current Draw
Sometimes you cannot attach sensors to the gripper jaws. In these cases, you monitor the electrical current going to the servo motor.
When a motor meets physical resistance, it works harder. When it works harder, it pulls more electricity. You can use a current sensor to measure this draw. Your code watches the current levels as the claw closes. When the current spikes, it means the jaws just hit the object. Your code instantly stops the movement command, locking the servo in its current position.
Distance Sensors for Pre-Grip Alignment
You can also use ultrasonic or infrared distance sensors. These go on the outside of the claw.
Your code reads the distance to the target object. It prevents the claw from closing until the object is perfectly centered between the jaws. This prevents the robot from grabbing empty air or hitting the object off-center.
Tool vs Tool: IDEs for Robotics Programming
Choosing the right development environment impacts your workflow. Here is a comparison of the two most popular tools for writing hardware control logic.
| Feature | Arduino IDE 2.0 | PlatformIO (VS Code) |
|---|---|---|
| Best For | Beginners and quick prototypes | Complex projects and professionals |
| Library Management | Built-in graphical manager | Advanced dependency tracking via config files |
| Code Autocomplete | Basic suggestions | Advanced, AI-capable intellisense |
| Compilation Speed | Slower on large projects | Highly optimized and fast |
| Version Control | Manual or third-party tools | Native Git integration is built in |
| Hardware Support | Thousands of basic boards | Supports enterprise-grade microcontrollers |
If you just need to get a desktop servo moving quickly, use the Arduino IDE. If you are building a multi-sensor robotic arm with complex state machines, invest the time to learn PlatformIO.
Debugging Common Claw Code Failures
Hardware programming introduces unique bugs. When your software interacts with the physical world, standard debugging techniques often fall short. Here is how to fix the most common issues.
The Jitter Problem
You upload your code. The claw moves to the correct position, but it shakes rapidly. It sounds like it is buzzing. This is called jitter.
Jitter rarely means your logic is wrong. It usually means your power supply is weak. Servos pull large spikes of current when they move. If you power the servo directly from a basic microcontroller board, the board cannot supply enough juice. The voltage drops. The microcontroller resets for a fraction of a second, causing the motor to twitch.
Always power your servos from an independent power supply. Connect the ground wire of the separate power supply to the ground pin of your microcontroller. This creates a common reference point for the PWM signals.
Blocking Code and Delays
The most common software mistake is using the delay() function.
When you use a standard delay command, you pause the entire processor. The microcontroller literally stops doing anything else while it waits. If you tell the claw to close and then add a two-second delay, the processor cannot read the force sensors during those two seconds. The claw will crush the object.
You must write non-blocking code. Use the built-in hardware timers. In C++, you use a millis() function to check how much time has passed since the program started. You compare the current time to your last recorded time. If enough time has passed, you execute the next small step. This allows the processor to continuously run the main loop and check sensors thousands of times per second.
Logic Loops That Will Not Break
Sometimes the claw closes, hits the object, and just keeps trying to close. The motor whines and overheats.
This happens when your exit condition in a The while loop is never met. For example, you tell the loop to run until the force sensor reads exactly 500. Real-world analog sensors fluctuate. The sensor might jump from 498 to 502. Because it never hit exactly 500, the loop never breaks.
Always use greater-than or less-than operators for sensor thresholds. Tell the loop to break when the sensor reading is >= 500. This simple change prevents infinite loops and saves your hardware from burning out.
Scaling Up: SaaS and Fleet Management
Writing code for one robotic claw is a fun engineering challenge. Managing code for a thousand robotic claws requires enterprise software.
Manufacturing facilities use specialized SaaS platforms to monitor their automation hardware. These platforms track the performance of every single actuator. If a specific claw on an assembly line starts drawing 10% more electrical current to achieve the same grip strength, the software flags it. This indicates mechanical wear. The maintenance team can replace the part before it fails and stops the production line.
These enterprise systems also handle over-the-air (OTA) updates. If an engineer writes a better, more efficient movement algorithm, they do not manually plug a cable into every robot. They push the new compiled code through the cloud. The SaaS platform updates the entire fleet simultaneously during scheduled downtime. This level of management is a major segment of modern saas for business solutions.
Final Steps for Reliable Automation
Writing good software for physical hardware requires patience. You cannot rush the testing phase. Mechanical parts have momentum. Sensors have electrical noise. Your software has to account for all the messy realities of the physical world.
Start simple. Write a basic script that initializes your hardware safely. Move your servos slowly. Add one sensor at a time. Test the limits of your mechanical parts before you try to grab anything fragile.
Take a look at your current control loop. If you are using standard delay functions to manage your timing, rewrite that section today. Switch to a non-blocking timer approach using milliseconds. Your mechanical movements will instantly become smoother, and your processor will finally have the bandwidth to read sensors in real-time.
Looking for premium tools at unbeatable prices?
Discovering the right software at the best price shouldn’t be complicated. At TopSoftwareOffers, we carefully research and verify tools so you can save both time and money. Our platform highlights genuine discounts, exclusive deals, and trending software solutions trusted by professionals worldwide.